Wednesday, November 27, 2013

Peacock Cosmetics Natural Mineral Eye Shadow Pigments in Passion Pit, Milky Way, and Midnight Sky

Hey there everyone, I have something a little different for you all today, as I normally review polish, today I am reviewing Peacock Cosmetics natural mineral eye shadow pigments in Passion Pit, Milky Way, and Midnight Sky. I had another named Sand Stone, and unfortunately it had an untimely demise before I was able to try it out. Sand Stone took a horrible tumble off of my counter top and rolled into one of my heating vents that my lovely children had taken the cover off of to retrieve a pencil or something like that, unfortunately due to the size and rolling ability of the pigment container I was not able to retrieve it :( But I can tell you that I'm super bummed because I really like the look of that color! Anyway, try not to make fun of my make up applying skills, like I said I don't normally due eye shadow pigments, but I am trying to branch out. Also, don't judge me I may have been playing around a bit with the last pigment that I'm showing you :) Peacock Cosmetics is a fairly new shop owned by a lovely lady named Julie out of Ohio. She is looking at expanding her creativity into nail polish and facial powder! I can't wait to see what else she creates!

Alright to start this off I have Passion Pit, which Julie over at Peacock Cosmetics describes as a dark red with gold glitter. Personally I think it looks more copper, and seems to have a holographic glitter to it. I really liked this pigment! Below you will be able to see the pigment as a loose powder and then with water added to it. Now like most loose mica pigments they are kind of messy and you do need to be careful, because they do tend to "drop" onto other parts of the face off of your brush, but I didn't have that issue with this color.


This was taken with the flash on and I added it because you can really see the sparkle in there. The upper is with water added to make more of a paste and the lower is just the powder applied with an eye shadow sponge.


This is a more color accurate photo of this pigment. And again you can really see the sparkle in there. I absolutely love this color, especially after adding water to it.

 Right eye
Here I have the powder applied to my lower lid using the eye shadow sponge, to my upper using an eye shadow brush, and then I took some wet on my eye liner brush and lined my top lid.

 Left eye
On this side I covered the whole lower lid with the water added cream/paste. And the effect is phenomenal in my opinion. It really brightens up the color and brings out the lovely sparkle. 

And here you can see both eyes and the dramatic difference that creating the cream/paste with a bit of water makes. So for a more subtle daytime/work look you would want to go with the powder look and line your eyes with the cream/paste. And then to make it an evening look you would want to go with the cream/paste look to make it more dramatic and stand out. Either way I enjoy this color.

Next up is Milky Way, which Julie describes as a light cream color with gold glitter. I completely agree with her description on this one. It's a very delicate color and I enjoyed wearing this pigment while I was out applying for new jobs! It lasted all day long! I was so impressed with how well it still looked after a long day applying for jobs, wrangling my kids, and doing some shopping! 
 Above you can see on the left is the powder and on the right I added water. Both look very lovely.

Here you can see on my right eye I have the cream/paste on and on the left I have the powder applied with a brush.


Here you can see the difference a little bit better. Although since this is such a light color it's not as dramatic of a difference as the darker colors. Although it is still stunning either way.


Left eye
Here you can see the very subtle and natural looking cream color that I applied with a brush to my upper and lower lid.


Right eye
Here I have applied the cream/paste version to my lower lid and then took the powder to my upper lid with a brush. I absolutely love it this way.


Here you can see I added a bit of liner, I used Peacock Cosmetics Midnight Sky to do this. (More on Midnight Sky below) I really love this look and it was very easily achieved!


This is me getting ready to go apply for jobs and enjoy my day! Although I did have to put my glasses on before leaving the house. It just looks better to take them off for pictures :)


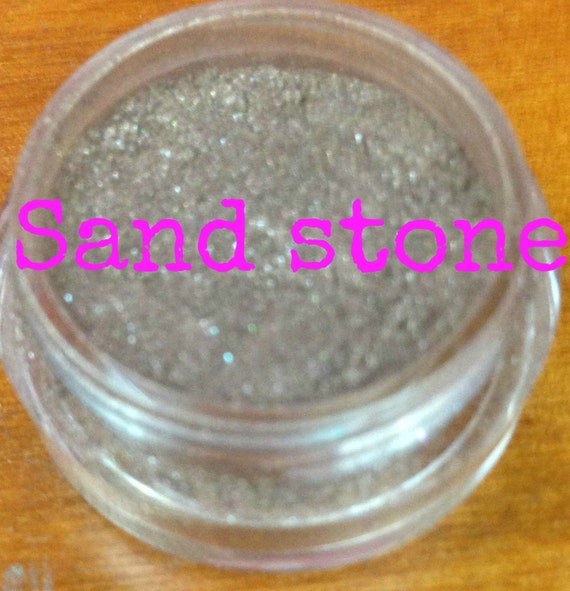
Here is a picture from Peacock Cosmetics of Sand Stone, even though I can't show it to you on me, I still wanted to to show it to you because it's a lovely natural color, also. Sand Stone is a natural light tan with golden glitter to it. I really wish I would have been able to show you all this color also!
sand stone a light tan color with gold glitter Natural Mineral Eyeshadow Mica Pigment 5 Grams

Now last but not least I have Midnight Sky, which described by Julie is, a black matte base with silver holographic glitter. And again I agree with her completely it is a very pigmented black matte shadow with some holographic silver glitter in there. Normally this isn't a color I would have chosen for me, but Julie threw it in with the other colors, so I couldn't not check it out. I have to say that I really love using it as a liner. It stays on so well compared to regular eye liners. But I did play with this one a bit so here are the reasons for the "don't judge" comment earlier :)

 Above you can see on the left is the powder alone, and on the right is the cream/paste after adding a bit of water.

Left eye
You see I only have on the cream/paste effect here and tried to do the fun retro lash thing, but it didn't work out so well :)


Right eye
Here I started with my lower lid and applied the powder using an eye shadow sponge then I swept over the top lid with a bit more powder on a brush to even and blend the look. Finally I used the cream/paste effect to line my lids.


Even though this is darker than I usually go, I could see me totally wearing it the way I have on the right side out on the town. It blended very well.


This is one of those colors that you would want to do your eyes before you did all your other make up though, just in case some of it "dropped" onto another area of your face. That way you could clean it off without having to redo your whole look. As it will streak and leave black marks until you properly clean it off.

I really enjoyed these pigments and I recommend any one who sees this to definitely check out Julies shop, Peacock Cosmetics on etsy. She has all kinds of colors blues, teals, purples, greens, and more. Julie was also kind enough to offer my readers a 10% off discount code: enchanting, good until December 31st, 2013. So go buy something and show her that we are here supporting her! I also, noticed a few other promo codes at her etsy store, there's one for free shipping with a $15 purchase and another for 10% off that expires on the 25th. But please if you purchase because you saw her products here I would appreciate you using the code, enchanting to receive your 10% off!

Thank you all for your time, I hope you enjoyed this post as much as I enjoyed creating it.  Please come back again soon to see what else I have lined up for you.  Have a wonderful day and don't forget to smile, you never know whose looking :)

Saturday, November 16, 2013

NAILTHINS and MANISKINS review!

Hey there everyone, today I have some awesome things to show you called NAILTHINS and MANISKINS. I'm going to start by explaining a bit of what NAILTHINS are, these are super thin nail art decals that don't require water or heat to use. You simply cut out your design and peel it away from the backing, then apply to your previously polished and completely dried nails. After applying and getting it just where you want it, you should make sure that there is at least a 1 mm border away from your cuticle. After getting it where you want it and smoothing it out and pressing it down well you cut away any excess that sticks off your nail, then you file around any edges that the NAILTHIN meets in a downward motion,and gently back and forth around the cuticle. Then smooth it down again. After that you apply 2 coats of you favorite top coat and voila done! You can check out her instructional videos for both the full nail wraps (MANISKINS) and the regular NAILTHINS at: www.youtube.com/user/NAILTHINS.  Also, there are over 180 different designs available and each generally come with 20 decals per sheet for $3.75, some will have an assortment of sizes on the sheet. Now for the sharing of what I received and what I thought! First I will show you the Raven Feather design which I absolutely love. After the first finger and watching the video I think I did a pretty decent job and they lasted for a week! Which is awesome for me, because I work in a nursing home so there is tons of hand washing taking place!
Next I tried out the Peacock Feather design, which is my absolute favorite! And I had just as great an experience with these. Now due to how curved and small my nails are I did have slight increasing on my thumb but nothing major and it so did not take away from the overall awesomeness of the look.


This is actually the first one that I tried and you will be able to see my mess ups and why you need to be absolutely certain your polish is completely 100% dry. This is one of her Swirl designs. I still wore it for about 3 days even though I kinda messed up. It still looked pretty good, but with the close up of the camera you can see better that it wasn't dry and messed up a little bit causing some bubbles on the edges.
Last but definitely not least the Pink Camo MANISKIN (full wrap). Which I used on my toes and am still rocking 3 weeks later. I applied these over Essence Modern Romance (a light shimmery pink). These are super cute and way fun! The instructions make them seem harder to apply than they really are, as long as you follow the instructions it's really quite easy. Pardon my not so cute toes, but the punk camo makes them super awesome! I did have a few wrinkles, but I'm quite sure it's harder to get them perfect on toes than it would be fingers!


I hope you enjoyed this post and found some fun new decals, you can find NAILTHINS on, etsyfacebookweb page, and youtube. Please come back again soon to see what else I have lined up for you. Have a wonderful day and don't forget to smile, you never know whose looking :)

Friday, November 15, 2013

Alchemy Lacquers review of Marshmallow, Winter Cherry, Flax, Trillium, and Juniper

Today I will be introducing you to a fairly new indie brand, Alchemy Lacquers. She started her business like many others have over the past, at her dining room table with her mother, some glitters, and some mineral pigments. She wore what she created for a while and after finding that people liked it and that it was stable she decided to open up her shop on etsy, she also has a page on facebook, she also has another online site. I will be introducing you to Marshmallow, Winter Cherry, Flax, Trillium, and Juniper.
First up is Marshmallow, which has a pink crelly base with red overtones. There are also hints of gold and purple in the right light. Here is a little bit from Alchemy Lacquers on how she came up with this color. The light pink flowers of the marshmallow plant from which the color of this lacquer is derived, are traditionally used as a gargle for the mouth. The sweet confection we all know, has its roots, literally, in the marshmallow plant, as the French went through laborious efforts to make an extract from the roots to make the marshmallow. However, modern day marshmallows don't contain any actual marshmallow. Here are some pictures for you, in them I am wearing 3 coats of this lovely polish.


Next up is Winter Cherry which has a peach crelly base with turquoise undertones and gold and red flecks. Here is where Alchemy got the inspiration for this color. Named after the paper covering that hides the fruit of the Winter Cherry, the plant has been in the Eastern medicine for centuries. Commonly used in Chinese medicine, the fruit of the Winter Cherry is can be used to reduce fevers, stop coughs and as an expectorant. In parts of the world, a juice from the berries is used to remedy kidney and bladder issues. Here is the lovely Winter Cherry, I'm wearing 4 coats of this polish, which is more than I normally do but totally worth it for this polish.


Now for Flax, which has a light blue/purple creme base with turquoise micro glitters and flashes pink in the right light. Here is what gave Alchemy the inspiration for Flax. Named after the flower of the herb that bears it's name, Flax is one of the world's oldest crop plants. Flax is a multipurpose herb; fibers derived from its stream, medicinal punctures from the herb and oils from the seeds. While the seeds and oil have been used medicinally in many cultures for centuries, the herb itself is used in modern herbal medicine to treat a variety of ailments ranging from sore throats to gastric disorders. Here is Flax for you, and I am wearing 3 coats of this beautiful color.


Here is Trillium, which has a maroon crelly base with specks of gold and pink to yellow shifting flecks. In the pictures I have on 3 coats built up and 2 coats over black on my letter and pinky finger. You can use this polish alone built up or over your favorite creme polish to change it up a bit. Academy's inspiration for this polish came from: Trillium or "Beth Root" is traditionally used as an astringent, made from the root, and was said to be useful in controlling upset stomachs. The dark red, three petaled leaves are commonly found growing in the shade of the forests in North America and Asia. Here you can see her masterpiece.


Last but not least is Juniper, which has a blackened blue/green jelly base with purple color shift. This is another that can be built up alone, which I did with 3 coats, or over a creme polish to liven it up, I used black on my middle and pinkie with 1 coat Juniper. Here's what inspired Alchemy for this color: The blue Juniper Berry is widely used as a spice in cooking, however, it is best known as the primary flavoring in Gin. In medicinal use, it has traditionally been used by Native Americans to treat diabetes and by some herbalists, the ripened berries have been used to treat conditions such as sciatica or asthma. Here it is for you.


I hope you liked this post and found some new polish favorites! Again you can find Alchemy Lacquers on Facebook, on etsy, or on her webpage. Please come back again soon to see what else I have lined up for you. Have a wonderful day and don't forget to smile, you never know whose looking :)

Thursday, November 14, 2013

TDLNailDesign water decal review!

Tonight I have another wonderful shop to invite you to check out. It is TDLNailDesign, they have some very wonderful nail decals! I had the pleasure of trying out her bats for Halloween, the Zombie Response Team, her Fleur Di Lis, Sparrow, Breast Cancer Butterfly, and Feel Your Boobies decals. I plan to order some from her soon also because she has so many different amazing things including but so not limited to  many different pin up girls, yes I said pin up girls! Her awesome looking sugar skulls, a blowing dandelion one, and her dark fairy one just to name a few! To apply these you cut around your decal design, getting as close to the design as possible without cutting into it, wet the paper backing for about 30 seconds (or until the decal slides off easily) lay the decal on your dry nail position where you want it, get out bubbles and creases then apply your favorite top coat! Each set comes with 12 decals for $1.99!
So let's get started! Here are the bats that I rocked for Halloween! I will let you all know that I messed up a bit with this one, I didn't let my polish dry before applying the decal! That's why this one looks a bit funny.
Next the Feel Your Boobies for breast cancer awareness last month, and really anytime! I really loved this and got tons of positive feedback on it, sending everyone that asked to check out her shop. Now you can see there were a couple creases in mine, I have very small hands and in turn small nails, my nails also curve quite a bit so that's the reason for the creases. It did not take away from the awesomeness of these decals in any way.
Then we have the Sparrow, which I love. It's a simple design, but really brought my mani to life.
I also had the Breast Cancer Butterfly, which has tons of detail and is so amazing and unique. I've not seen another like it.
Here is my absolute favorite, just because I'm weird like that, the Zombie Response Team decal. There were a few creases along the edges of this one also, but this polish hid them a bit better than the color I had on with the other circle decal.
Last but definitely not least, the very detailed Fleur Di Lis. I love how much detail is in this and that you can see it well.

I hope you enjoyed this post and found some new decals you just can't live without, I know I did. Again you can find the shop on etsy or on facebook. You should also consider checking out her natural beauty supplies at TDLBodyShop. Please come back soon to see what else I have lined up for you. Have a wonderful day and don't forget to smile, you never know whose looking :)